How to Make Homemade Lip gloss
Lip Gloss does more than simply make lips shine. It can protect, heal and even make the lips more kissable. While lip gloss is generally not hugely expensive, it may be in your best interest to consider making your own. Why would you do all this extra work for something that you can quickly purchase at the grocery store? Well, that is up to you, but making your own homemade lip gloss gives you the ability to custom make your own flavors, styles, even shades, and tailoring flavors that your other half loves may give him more reason to check out the flavor of the day.
Making Vanilla Lip Gloss
Vanilla is a hugely popular flavor for men and women alike and with just a little work you can make your own in batches that will really give you a unique homemade lipgloss like no other.
First, the ingredients:
1 tablespoon grated beeswax
1 tablespoon coconut oil
1/8 teaspoon vitamin E oil
1/8 teaspoon vanilla extract
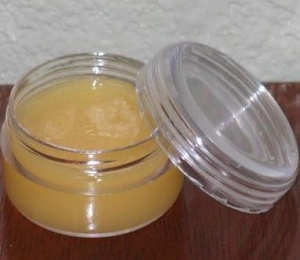
In an ovenproof container place the beeswax, vitamin E oil and coconut oil and set your heat to low. Heat the contents slowly until the wax and oils are melted. Then add the vanilla and mix well. Pour the contents into a small clean container and let it completely cool before using.
Honey Kool-Aid Sweet Gloss
Kool-Aid lipgloss seems like one of the best things ever. This one should get your lips-a-smacking.
2 tablespoons vegetable shortening
1 tablespoon Kool-Aid
1 tablespoon Honey
2 tablespoon Hot Water
In a small bowl mix one tbsp of the solid vegetable shortening and one tsp of honey. In another bowl mix the Kool-Aid mix with ¼ tsp of hot water until it is dissolved. Stir in the maximum amount of Kool-Aid that you can which will depend based on how hot the water is. Make sure to choose a color and flavor that you want to use as the color will show up on your lips and the flavor will be strong enough to taste easily.
Add one drop of water into the honey/shortening mix. Stir it well then add another until you get the right flavor and color combination that you want. Use an old lipgloss jar or clean container to store the mix in the refrigerator. This should be good for about three days, but I would be shocked if you didn’t use it all up before that.
With this recipe you can exchange the Kool-Aid for something else like Soda, melted Pop Rocks, or even flavored teas. Another consideration would be using hot cocoa mix for a chocolate flavor lip-gloss. Experiment with different essential oils as well to really keep your lips healthy and shining. Things like peppermint oil or tea tree oil can add a little zing to your homemade lip gloss and also put a good amount of healthy stuff in at the same time.
These recipes are a great starting point and give you a few ideas of how to make your own, now just start experimenting with these as the base and see where you end up.
Kendra Cela has shared this article for our readers. If you are interested for career in fashion, you can visit her to learn more!



superb