Paper Toy Transformer
Are you sitting idle and want to have some fun or want to spent your leisure time in making a toy then here is a simple paper toy transformer which is simple and easy to make and just needs the stuff which you would already have with you in home. Process of making paper toy transformer and its video tutorial is as follows.
Paper Toy Transformer
Stuff Required:
- Hard Paper (12cm x 24cm)
- Scissor
- Pencil or Marker
- Ruler
- Transparent Scotch Tape
Video Tutorial:
Instructions:
Preparation
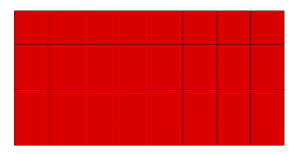
Take the paper and mark the 24cm length into 8 equal sections. Draw the straight lines and you will get 8 strips of (3cm x 12cm) size.
Now mark the 12cm width into 3 sections having sizes 3cm, 4cm and 5cm respectively. Draw the straight lines and 3 strips of (3cm x 24cm), (4cm x 24cm) and (5cm x 24cm) size will be marked on the paper.
Cut the 8 strips of (3cm x 12cm) sizes.
Assembly
Fold the each strip from the marked locations and connect the strip ends together with transparent scotch tape. Hence each strip will form a shape of triangle.
Now place the triangles facing 5cm long side upward and bind the two triangles together from 5cm long side. This way you will get 4 pairs of connected triangles.
At next step take two pairs and place in a row having 3cm side facing you and bind both pairs connecting 3cm sides together. Do the same for other two pairs.
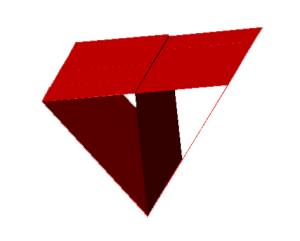
Now you will have two sets of 4 connecting triangles. Place them together having 4cm long sides face to face and 3cm long sides facing upward. Bind edge triangles together from both ends and your paper toy transformer is ready.
Move the triangles and enjoy making different shapes.










Comments are closed.