Tips To Convert Your Favorite Drawing In To Embroidery Design
The growth and evolution of needle work has been prevalent since centuries. There are a variety of designs available on the internet but if you want to make your own unique designs, you should go for your own custom made designs that can be converted to embroideries easily with the help of embroidery digitizing technique. For instance, if you want to embroider your favorite scenery or convert your beloved’s picture to a fabric, then drawing it manually can be a very difficult task to accomplish. Here are a few points that can be analysed and practiced to learn the skills of digitizing and embroidery designing;
Embroidery digitizing:
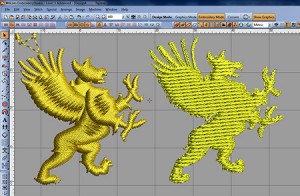
Embroidery digitizing is a process in which artwork is converted to a file that is programmed to be deciphered by the machine. This design is then converted to different kinds of stitches. In no way can digitizing be called a one click process. It requires years of hard work and training to master the skills of embroidery digitizing. This is the perfect way to convert your favorite design to embroidery precisely and with minimal effort.
Initial Artwork:
First of all, you need to prepare an artwork for the initial embroidery. Most images do not come out beautifully in all embroideries. Many small logos need to be enlarged to show them prominently, and many outlines would need to be reduced. These are some major changes that are to be made to get the desired results on the embroidered fabric.
Pathing:
Pathing is the trickiest part in embroidery design. It rules the outlook of the embroidery design right from the start to the end. You need to take special precautions while you are trying to program the digitizer for performing pathing. If a design is not embroidered in the correct manner with proper pathing techniques, you might get loose threads and patches of visible fabric here and there.
Stitch types:
After pathing is done, the digitizer then has to assign specific stitch types for specific portions of the fabric. The underlying stitches are monitored very carefully as they are the foundation of the whole embroidery. To get even embroidery, it is very important to take care of the underlying pieces. There are primarily three types of stitches: run, satin and fill stitches. There are variations to these basic stitches. To cover larger areas, fill stitches are generally applied. While making decisions on the direction of the stitches, when to stop the design and other miscellaneous things, the digitizer must make appropriate adjustments. It will be a futile effort if the task is not accomplished properly as the embroidery will not be appropriate.
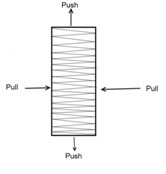
The effect of push and pull on embroidery design:
Usually, when we design huge pieces of fabric or try and craft elaborate designs or use bulky fabrics, the fabric has a tendency to shift, causing the stitches to get pulled. The digitizer must take into account such possibilities and work accordingly, making the necessary adjustments.
A few tips at a glance:
- Breakdown the artwork to a simplified form.
- Try and add more space between alphabets so that the stitches don’t appear clumsy.
- When you cover large areas, use Tatami fill or a Step.
- It is advisable to follow shortest distance possible while stitching. For example, for the letter I, stitch horizontally rather than stitching vertically.
- After you finish, delete small stitches. These can otherwise cause thread breaks.
- Save production time by making the needle stay on the material as much as possible.
It takes time and skill to become a good digitizer. Always start from the background and gradually move towards the foreground to get a good embroidery design crafted on your chosen material.



Comments are closed.